What's better than a DIY for an awesome Fall Wreath? It's time for a little seasonal fun! Let's get straight to the "how-to".
Everything that my friend and I used for this project was bought at Hobby Lobby. If there isn't a Hobby Lobby near you, I would suggest either Michaels, orrr... any other art store. Seriously people, go to any major art store and you'll find everything you need. I spent $25. Totally worth it. Especially since wreaths retail anywhere between $80 & $120. This is so worth it.
Here's the list:
Metal/wired wreath- 12 or 16 inches
Burlap- 4 inches wide by 2.5 yards (11 strips total per wreath needed)
Super glue & Command Strip Hook- any glue that can work on fabrics and ceramics. I used Scotch Maximum Strength Glue. Command Strip Hooks are also sold at the craft store.
Embellishments- This is my favorite part (pumpkins, leaves, glitter, etc.)
Here's what to do:
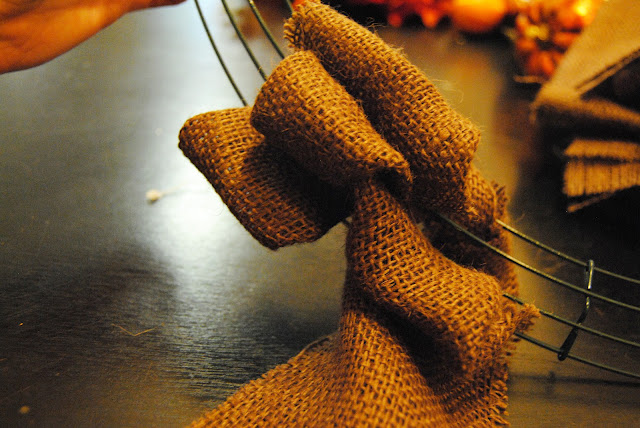
Make sure your burlap is cut into 4 inch wide strips that are 2.5 yards long. You need 10-11 strips for the wreath. Take the other edges of the burlap strip and bend them inwards. You'll want to do this pretty much the entire way around the wiring but it is supposed to be a little sloppy. It doesn't have to be perfect.
Take the loop and thread it through each individual spacing, and repeat... all the way around the wreath.
It should start to look like this. You will want to scrunch up the loops and push them closer together to create that extra bubbly effect.
Kristen hard at work. And yes, we got a ton of embellishments.
My wreath in its final stages.
Take your embellishments, and place them on your wreath. This is where a lot of super strength glue comes in handy.
Let me interject by saying that I love this little guy, Kristen's baby. Definitely enjoyed having him around today during our art extravaganza. Such a cutie!
Now the final product...
Gorgeous, right?
Happy Fall everyone! Hope you enjoyed the DIY!
Noemi


No comments:
Post a Comment